Shaving is a daily ritual that bridges the gap between self-care and grooming. At the heart of this ritual lies the essential tool known as shaving cream. This seemingly humble product plays a crucial role in achieving a smooth, comfortable, and irritation-free shave. In this exploration of shaving cream, we delve into its history, composition, types, application techniques, and its significance in modern grooming.
A Historical Glimpse
The practice of shaving dates back centuries, with various cultures employing different methods and substances to enhance the shaving experience. Ancient Egyptians, for example, used a mixture of animal fat and wood alkali to create a rudimentary shaving cream. However, the modern concept of shaving cream as we know it today began to take shape in the 19th century.
The earliest commercial shaving creams were introduced in the mid-1800s and were often available in solid or semi-solid forms. These early versions were primarily made from a combination of soap and water, with some formulations incorporating natural oils and fragrances. The evolution of technology and chemistry over the decades led to the development of more sophisticated and effective shaving creams that catered to specific skin types and preferences.
Composition and Formulations
Modern shaving creams are formulated to provide a luxurious and comfortable shaving experience. They consist of a blend of ingredients carefully chosen to create a rich lather, soften facial hair, and lubricate the skin. The primary components of shaving cream include:
Water: Water serves as the base of most shaving creams, providing the necessary fluidity for the product to be easily applied to the skin.
Soap: Soap, usually in the form of potassium or sodium salts of fatty acids, acts as a surfactant that breaks down oils and dirt, allowing for a thorough cleanse of the skin and hair.
Emollients and Oils: Natural oils, such as coconut oil, jojoba oil, and glycerin, are commonly added to shaving creams to moisturize and soften the skin and hair, reducing the friction caused by the razor.
Fragrance: Essential oils and synthetic fragrances are often included to enhance the sensory experience of shaving. These scents can range from traditional, woody aromas to more contemporary, citrusy notes.
Humectants: Ingredients like glycerin help retain moisture on the skin's surface, preventing excessive drying during the shaving process.
Stabilizers and Thickeners: These additives maintain the consistency of the shaving cream, allowing it to be easily whipped into a lather.
Types of Shaving Cream
Shaving creams come in a variety of formulations, each catering to different skin types, preferences, and techniques. The main types include:
Traditional Shaving Cream: These are often found in tubs or tubes and require the use of a shaving brush to create a lather. Traditional shaving creams offer a classic, nostalgic experience and are favored by wet shaving enthusiasts.
Brushless Shaving Cream: Also known as shaving gels or foams, these products do not require a brush for lathering. They are dispensed as a gel or foam and are particularly convenient for those seeking a quick and fuss-free shave.
Shaving Soap: While not exactly a cream, shaving soaps are solid formulations that require a brush to create a lather. They often have a more traditional feel and can provide a rich, dense lather.
Cream-to-Foam Shaving Cream: These products start as a cream and transform into a rich foam when applied to the skin. They offer a compromise between the traditional and brushless options.
Application Techniques
Achieving the perfect lather is key to a comfortable and close shave. Whether using a traditional shaving cream, brushless gel, or shaving soap, the following techniques can help create an optimal lather:
Traditional Shaving Cream with a Brush: Wet the brush with warm water, then swirl it in the shaving cream until a rich lather forms. Apply the lather to the face using circular motions, ensuring an even distribution.
Brushless Shaving Cream or Gel: Dispense a small amount of the product onto wet hands. Rub the product between your palms to create a lather, then apply it to the face.
Shaving Soap with a Brush: Wet the brush and then use circular motions to load the brush with soap. Transfer the loaded brush to a shaving bowl or directly to the face, then whip the lather into a rich foam.
Cream-to-Foam Shaving Cream: Apply a small amount of the cream to a wet face and massage it in. The product will transform into a lather as you work it.
Significance in Modern Grooming
In the era of multi-blade razors and electric shavers, the role of shaving cream might seem diminished. However, its importance in modern grooming cannot be overstated. Here are some reasons why shaving cream remains an integral part of the shaving process:
Protection and Lubrication: Shaving cream creates a protective barrier between the razor and the skin, minimizing friction and reducing the risk of nicks, cuts, and irritation.
Softening Facial Hair: The emollients and oils in shaving cream help to soften the hair, making it easier to cut and reducing the force required during shaving.
Moisturization: The moisturizing properties of shaving cream prevent the skin from drying out during the shaving process, leaving it feeling soft and supple.
Enhanced Sensorial Experience: The scents and textures of shaving creams add a sensory dimension to the shaving ritual, transforming it from a routine task into a moment of self-indulgence.
Preparation for Shaving: The act of applying shaving cream serves as a preparatory step, opening up the pores and lifting the hair follicles, resulting in a more effective and comfortable shave.
Conclusion
Shaving cream, Geo F. Trumper with its rich history, diverse formulations, and multifaceted benefits, remains an essential component of the shaving ritual. Whether one prefers the traditional experience of using a brush and soap or the convenience of brushless gels, the act of lathering up with shaving cream continues to bridge the gap between personal care and grooming. In a world where efficiency often trumps tradition, the enduring significance of shaving cream as a tool for achieving a close, comfortable, and enjoyable shave reminds us that the simple acts of self-care can be imbued with meaning and satisfaction.
5 Simple Techniques For puppy care
![]()
Pets bring immense joy, companionship, and love into our lives. As responsible pet owners, it is our duty to ensure their well-being and provide them with the care they need. To accomplish this, a wide range of pet services are available to support and enhance the lives of our furry friends. This comprehensive guide aims to explore various essential pet services, including veterinary care, grooming, training, boarding, and pet sitting. By understanding these services and their significance, you can make informed decisions to promote the health, happiness, and overall quality of life for your beloved companion.
Veterinary Care:
Proper veterinary care is vital for the well-being of your pet. Regular check-ups, vaccinations, preventive treatments, and emergency services are part of comprehensive veterinary care. This section delves into the importance of veterinary care, selecting a veterinarian, scheduling routine visits, identifying signs of illness, and emergency preparedness.
Grooming Services:
Grooming plays a significant role in maintaining your pet's hygiene, appearance, and overall health. This section discusses the benefits of grooming, the different grooming services available, such as bathing, brushing, nail trimming, ear cleaning, and haircuts. Additionally, it highlights the importance of dental care and regular grooming routines tailored to your pet's specific needs.
Training and Behavioral Services:
Proper training is essential to ensure your pet's safety, obedience, and socialization. In this section, we explore the significance of training and behavior modification for pets of all ages. We discuss basic obedience training, housebreaking, leash training, and addressing common behavioral issues. Additionally, we provide guidance on selecting a reputable trainer and explore alternatives such as online training programs.
Boarding Services:
When you need to be away from home, reliable boarding services provide a safe and comfortable environment for your pet. This section covers the benefits of boarding facilities, choosing the right one for your pet's needs, preparing your pet for boarding, and ensuring a smooth transition. It also includes information on specialized boarding services for specific animals, such as cats, dogs, and exotic pets.
Pet Sitting and Dog Walking:
For shorter absences or daily routines, pet sitting and dog walking services are valuable options. This section explores the advantages of hiring a pet sitter, including reducing stress for your pet, maintaining their routines, and receiving personalized care. It also provides insights into finding a trustworthy pet sitter or dog walker, arranging initial meetings, and establishing clear expectations.
Pet Transportation:
Whether it's a trip to the veterinarian or a long-distance move, pet transportation services can be incredibly helpful. This section highlights the conscious leadership importance of safe transportation, choosing the right service provider, preparing your pet for travel, and ensuring their comfort throughout the journey. It also covers regulations and documentation required for domestic and international travel.
Alternative Therapies and Services:
In recent years, alternative therapies and services have gained popularity for their potential benefits to pets. This section introduces various alternative treatments, such as acupuncture, chiropractic care, massage therapy, and hydrotherapy. It also discusses the potential benefits, considerations, and finding qualified professionals who offer these services.
Conclusion:
Pet services play a crucial role in ensuring the well-being, health, and happiness of our animal companions. By understanding the significance of each service, you can make informed decisions to provide optimal care for your pet. From veterinary care and grooming to training, boarding, and pet sitting, a wide range of services is available to cater to your pet's specific needs. Remember, a well-cared-for pet is a happy pet, and investing in their overall well-being is a testament to the love and commitment you have for them.
Not known Facts About Best Price Tungsten Carbide Scrap
Carbide scraps are valuable materials that have gained significant recognition in various industries due to their exceptional hardness, durability, and heat resistance properties. As a result, carbide scraps have become sought-after commodities, attracting the attention of buyers worldwide. This comprehensive guide aims to provide you with essential information on carbide scraps buyers, their role in the market, and valuable tips to maximize your returns when selling carbide scraps. So, whether you're a business owner, a scrap metal dealer, or an individual looking to sell carbide scraps, this guide will equip you with the knowledge and strategies to make informed decisions and secure the best deals.
Understanding Carbide Scraps:
Definition and Properties of Carbide Scraps:
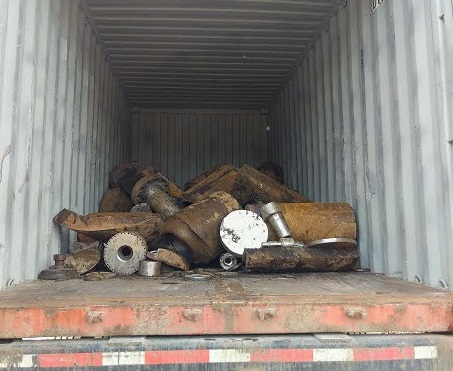
Carbide scraps primarily consist of tungsten carbide, a compound known for its extreme hardness and resistance to wear. It is commonly found in various forms, such as inserts, cutting tools, drills, and end mills. Other types of carbide scraps include cobalt, titanium carbide, and tantalum carbide, each with distinct properties and applications.
Value and Demand:
Due to their high value and wide-ranging applications in industries like manufacturing, mining, construction, and automotive, carbide scraps have a steady demand in the market. The scarcity of tungsten and cobalt, key components in carbide, further contributes to their value.
Role of Carbide Scraps Buyers:
Identifying Potential Buyers:
Carbide scraps buyers can be found in various forms, including metal recycling companies, scrap yards, online platforms, and specialized buyers. Researching and identifying reputable buyers with experience in handling carbide scraps is crucial to ensure fair prices and reliable transactions.
Assessment and Valuation:
Buyers typically assess the quality, quantity, and condition of carbide scraps before determining their value. Factors such as carbide content, cobalt percentage, and the presence of contaminants influence the price offered. Understanding the grading systems used by buyers can help you gauge the quality of your scraps and negotiate better deals.
Pricing and Negotiation:
Buyers set their prices based on factors such as market demand, current metal prices, and the quality of the carbide scraps. Negotiating with multiple buyers and comparing offers can help you secure the best possible deal for your scraps.
Finding the Right Carbide Scraps Buyer:
Reputation and Reliability:
Look for buyers with a solid reputation in the industry, verified certifications, and positive customer reviews. A reliable buyer will adhere to fair trade practices, transparent pricing policies, and ethical recycling methods.
Expertise and Experience:
Consider buyers who specialize in handling carbide scraps and have extensive experience in the field. Such buyers are more likely to accurately assess the value of your scraps and provide competitive offers.
Accessibility and Convenience: Choose Tool Steel Waste Management buyers who offer convenient services, including pickup options, safe transportation, and easy documentation processes. This can save you time and effort when selling your carbide scraps.
Maximizing Returns on Carbide Scraps:
Sorting and Preparation:
Properly sorting and preparing your carbide scraps before selling can significantly impact the value you receive. Remove any non-carbide materials, such as steel or aluminum, and ensure the scraps are clean and free from contaminants.
Bulk Selling:
Selling larger quantities of carbide scraps at once often leads to better prices. Accumulating a significant amount of scraps before contacting buyers can help you negotiate favorable deals and minimize transportation costs.
Market Timing:
Keeping an eye on the market trends and prices of carbide scraps can help you identify optimal times to sell. During periods of high demand or when metal prices surge, you can potentially fetch higher prices for your scraps.
Building Relationships:
Establishing long-term relationships with reliable carbide scraps buyers can lead to mutually beneficial partnerships. Repeat transactions with trusted buyers may result in better pricing, preferred customer status, and access to exclusive opportunities.
Conclusion:
Selling carbide scraps can be a profitable venture when approached with the right knowledge and strategies. By understanding the properties of carbide scraps, identifying reputable buyers, and employing tactics to maximize your returns, you can ensure a successful and rewarding experience. Remember to research thoroughly, compare offers, and maintain the quality of your scraps to secure the best deals. With the information provided in this guide, you are now equipped to navigate the carbide scraps market confidently and make informed decisions that optimize your profits.
custom vinyl lettering for crafts - An Overview
Vinyl lettering has become increasingly popular in recent years, thanks to its versatility and affordability. Whether you're looking to add a personal touch to your car, create custom signage for your business, or decorate your home, vinyl lettering offers endless possibilities. In this guide, we'll walk you through the process of creating and applying custom vinyl lettering, step by step. So let's dive in and explore the world of custom vinyl lettering!
Understanding Vinyl Lettering
Vinyl lettering is a form of adhesive signage made from a thin, self-adhesive vinyl material. It typically comes in rolls or sheets and can be cut into various shapes and sizes using a vinyl cutter or plotter. The lettering is usually pre-spaced and ready to be applied to a wide range of surfaces, including walls, windows, vehicles, and more. Vinyl lettering is available in a multitude of colors, finishes, and fonts, allowing you to create a truly personalized look.
Gathering the Necessary Materials
Before you begin creating your custom vinyl lettering, make sure you have the following materials:
Vinyl sheets or rolls in the desired color(s)
A vinyl cutter or plotter
Transfer tape or application tape
Scissors or a cutting tool
A squeegee or credit card for application
Cleaning supplies (e.g., rubbing alcohol and a lint-free cloth)
Designing Your Lettering
The first step in creating custom vinyl lettering is designing the layout and text. You can use graphic design software or online tools to create your design. Consider the size, font, and color of the lettering to ensure it suits your intended application. Remember to keep the design simple and legible, especially if it will be viewed from a distance. Once your design is ready, save it in a compatible file format for your vinyl cutter or plotter.
Preparing the Vinyl
Using your vinyl cutter or plotter, load the vinyl sheet or roll and set the appropriate cutting settings according to the manufacturer's instructions. Ensure the blade is sharp for clean and precise cuts. Once the cutting settings are configured, send the design file to the machine and wait for it to complete the cutting process. Afterward, carefully remove the excess vinyl from around the letters using scissors or a cutting tool.
Applying Transfer Tape
To facilitate the application of vinyl lettering, transfer tape or application tape is used. Cut a piece of transfer tape slightly larger than your design. Peel the backing paper from the transfer tape and align it with the top edge of the vinyl lettering. Slowly lay the vinyl lettering for walls custom tape down, smoothing it with a squeegee or credit card as you go to remove any air bubbles or wrinkles.
Preparing the Surface
Before applying the vinyl lettering, ensure the surface is clean and free of dust, dirt, or oils. Wipe the area with rubbing alcohol and a lint-free cloth to remove any contaminants that may affect adhesion. Allow the surface to dry completely before proceeding.
Applying the Vinyl Lettering
With the transfer tape and vinyl lettering ready, position the design on the desired surface. Use a measuring tool or level to ensure proper alignment and spacing. Once positioned correctly, press the transfer tape onto the surface, starting from the top and working your way down. Use a squeegee or credit card to firmly press the vinyl onto the surface, ensuring good adhesion. Carefully peel off the transfer tape, starting from one corner and pulling it back at a 45-degree angle.
Finishing Touches
After applying the vinyl lettering, inspect it for any bubbles or imperfections. If you notice any, gently lift the affected area and smooth it out with a squeegee or credit card, applying pressure from the center to the edges. Take your time to ensure a smooth and bubble-free application.
Caring for Vinyl Lettering
Proper maintenance is crucial to ensure the longevity of your vinyl lettering. Avoid using abrasive cleaners or scrubbing the area where the lettering is applied, as this can damage the vinyl. Instead, clean the surface gently with a mild soap and water solution, using a soft cloth or sponge. Avoid using excessive force or scraping tools that could peel or lift the vinyl. Regularly inspect the lettering for any signs of wear or lifting, and address them promptly to maintain the appearance and durability of your vinyl lettering.
Removing Vinyl Lettering
If you ever need to remove the vinyl lettering, there are a few methods you can use. One common technique is to heat the lettering with a hairdryer or heat gun, which softens the adhesive and makes it easier to peel off. Start at one corner and slowly peel the vinyl, applying heat as needed. Alternatively, you can use a vinyl removal solvent or adhesive remover, following the manufacturer's instructions. Remember to be patient and work slowly to avoid damaging the underlying surface.
Additional Tips and Considerations
When choosing a font for your vinyl lettering, opt for bold and legible styles, especially for small sizes or long distances.
Test the vinyl and transfer tape on a small, inconspicuous area before applying it to the final surface to ensure compatibility and adhesion.
If you're applying vinyl lettering to a curved surface, use small relief cuts in the vinyl to allow it to conform smoothly.
Take measurements and use masking tape as a guide to ensure straight and even placement of the lettering.
Consider the contrast between the vinyl lettering and the background surface to ensure maximum visibility.
If you're new to working with vinyl lettering, practice on a spare piece of vinyl or a less visible surface before applying it to your desired location.
In conclusion, custom vinyl lettering provides a fantastic opportunity to personalize your space, promote your business, or add a touch of creativity to your projects. By following the steps outlined in this guide and taking the time to carefully design, cut, and apply the vinyl lettering, you can achieve professional-looking results. Remember to exercise patience, attention to detail, and proper care to ensure the longevity and visual appeal of your custom vinyl lettering. So, unleash your creativity and start exploring the endless possibilities of custom vinyl lettering today!

Stem cells Options

SCC+ (SystemC Configuration, Control, and Inspection) is an extension of SystemC that provides a unified framework for configuring, controlling, and inspecting SystemC models. SystemC is a C++ library that provides a hardware description language for designing and simulating digital systems. SCC+ extends SystemC by adding capabilities for runtime configuration and control of SystemC models, as well as a standard mechanism for inspecting the internal state of models during simulation. SCC+ enables more efficient and effective modeling of complex digital systems, making it a valuable tool for hardware and software engineers alike.
Overview of SystemC
Before diving into SCC+, it's important to understand the basics of SystemC. SystemC is a C++ library that provides a hardware description language for designing and simulating digital systems. It was developed as an extension to C++ to support the modeling of hardware components and systems. SystemC models can be used to simulate digital circuits, processor cores, memory controllers, and other digital systems.
SystemC is based on the concept of modules, which are basic building blocks for modeling hardware components. Each module is a C++ class that represents a hardware component and contains a set of ports for communication with other modules. Ports can be either input or output, and they are used to transmit signals between modules.
SystemC also provides a set of data types for representing signals, including bool, sc_bit, sc_logic, sc_int, and sc_uint. These data types are used to represent binary values, integers, and other data commonly used in digital systems.
SystemC modules can be instantiated and connected to form larger systems. The connections between modules are made using signals, which are transmitted between ports of different modules. SystemC models can be simulated using a variety of simulators, including the open-source SystemC simulator and commercial simulators from companies such as Cadence and Synopsys.
Overview of SCC+
SCC+ extends SystemC by providing a unified framework for configuring, controlling, and inspecting SystemC models. SCC+ consists of three main components: the Configuration Manager, the Control Manager, and the Inspection Manager.
The Configuration Manager provides a runtime mechanism for configuring SystemC models. Configuration parameters can be defined for each module in a SystemC model, and these parameters can be changed at runtime using the Configuration Manager. This allows engineers to adjust the behavior of a SystemC model without having to recompile the model or modify the source code.
The Control Manager provides a mechanism for controlling the execution of SystemC models. Control commands can be defined for each module in a SystemC model, and these commands can be invoked at runtime using the Control Manager. This allows engineers to pause, resume, or terminate the execution of a SystemC model, as well as perform other control operations.
The Inspection Manager provides a standard mechanism for sic inspecting the internal state of SystemC models during simulation. Engineers can define inspection points in a SystemC model, which allow them to examine the state of the model at specific points during simulation. The Inspection Manager provides a unified interface for accessing these inspection points, making it easy to monitor the internal state of a SystemC model.
Using SCC+
To use SCC+, you first need to download and install the SCC+ library. The library includes the Configuration Manager, Control Manager, and Inspection Manager, as well as other utilities for working with SystemC models.
Once you have installed the SCC+ library, you can start using SCC+ in your SystemC models. The following sections describe how to use each of the SCC+ components in more detail.
Configuration Manager
The Configuration Manager provides a mechanism for configuring SystemC models at runtime. To use the Configuration Manager, you first need to define configuration parameters for each module in your SystemC model. Configuration parameters are defined using the SC_HAS_PROCESS macro, which enables the use of the sc_module class.